Pages

Showing posts with label how. Show all posts

Sunday, June 12, 2016

How To Download And Install Hl Booster In Counter Strike


Download  here The hl booster.rar , unzipp the file (directly in addons or copy the booster folder in HLDScstrikeaddons, (HLDS is the directory where you have the server), then edit in HLDScstrikeaddonsmetamodplugins.ini,the
line:win32 addonshlboosterdlls ooster_mm.dll. Very important!!!! In order to work, in the HLDScstrikeserver.cfg you have to write the next line:

exec addons/hlbooster/hlbooster.cfg


Please UnCheck The Tick/Mark

Read More..

Monday, March 24, 2014

How to Reset Canon IP2770 Error 5200

How to Reset Canon IP2770 Error 5200. IP 2770 is a new printer, and I also at the first time get error 5200 on canon iP2770. Want to know how ...?

Early Indication:
When the iP2770 is turned on, the printer looks normal with GREEN LED on. But when ordered to print, then the 5200 on iP2770 error will appear, and the LED will blinking 8x green 1x orange.

How to Reset Canon IP2770 Error 5200

How To Reset Canon IP2770 Error 5200 :
  • The printer is off and plugged the power cord.
  • Press the RESUME button two seconds, then press the POWER button until the green light flame ( while pressing the POWER button, dont released RESUME button ) then release the Resume button, but do not release the POWER button.
  • POWER button while still pressed, press the Resume button 5 times. Led will flash alternately orange glow green with the last orange. (not to mistaken 4x because the printer will be totally dead, but it is temporary as well) Then ... 
  • Release both buttons simultaneously. Led will blink briefly and then will glow GREEN. And the computer will detect new hardware, just ignore ... 
  • Press the POWER button, then the printer will off. Press the POWER button again then the printer will on and ... 
  • PRINTER iP2770 is ready to use. 
Other way on How To Reset Canon iP2770 error 5200 : 
Turn the printer, and printer will look normal. Run the printer for printing a document or a print test, then the 5200 error will appear. Directly unplug the power cord without pressing on/off button Open it and slide it into the middle of its cartridges manually Unplug all cartridges and leave the lid open Turn on the printer, head carriage will move left and right because the lid is still open and will stop in the middle. Replace the cartridge, and close the right The printer will return to normal. servicetool_v1074_ip2770.rar

 this reset methode taken from Service Printer
Download Servicetool_v1074 for Canon iP2770
link
Read More..

Saturday, March 22, 2014

How to download Facebook Videos

How to download Facebook Videos
In This Tutorial I Will Explain You How to Download the Facebook Videos from your friends profile easily.

Step 1:- First Of all open http://m.facebook.com on your PC browser. (Google Chrome recommended)
Step 2:-Then Login to Your Account.
Step 3:- After Logging in to your account go The Video page (Fig-1)
How to download Facebook Videos
Fig-1
Step 4:- Click on the External Link and a new window Will Open. (Fig-2)
How to download Facebook Videos
Fig-2
Step 5:- Copy The URL of The Window.

How to download Facebook Videos

Step 6:- Now Paste this in the Internet Download Manager, add URL Window.

How to download Facebook Videos

Step 7:- Click OK and You are done the video from your friends profile will be downloaded without any streaming.
Read More..

Thursday, March 13, 2014

How to Fix Damaged Flashdisk

Source | togeltoto12.wordpress.com

You must be really upset if flasdisk yes you broken anything else in the flash you are some records or documents or files is very important for you and you could not take your pendrive is damaged but well here I would like to share your experiences about repairing a damaged flash , you want to know how where do I see the following.


1. lightweight:
First go to Run, type cmd, and then type chkdsk Drive Letter: / f
information
a. DOS chkdsk command is a command error checking on the disk
b. Letter Drive: Drive is the location of flash, this command places the contents of the flash drive.
c: / F was Fixes errors on the disk, the command to remove errors on the disk.

Wait until the process is running 100%, If a command Convert folder to file? [Type] Y. then delete the file / folder was corrupted with the command DEL V: *. *.


2. Rather heavy:
a. Download the application Hewlet Packard USB Disk Storage Format Tool
b. Install the application, and enter the flash are problematic to any USB port. Make sure your flash is detected
c. Run the application HP USB Disk Storage Format Tool
d. Determine where the flash drive is plugged in,
e. Select Create New or Replace Existing Configuration to create a new partition and erase the existing configuration on the flash,
f. Format your flash file system in accordance with the desired.

3. Weight:
If the stick were damaged by bad sectors, the next step could be the last alternative use Partition Magic utility. This tutorial uses Partition Magic 7.0.
With this software, we try to cut his Bad Sector by:

a. Install Partitioan Magic 7.0
b. Setelah proses instalasi selesai, jalankan programnya. Tekan menu Resize Partitions. Lalu arahkan ke drive tempat Flashdisk kita berada. Menu ini akan merubah ukuran partisi flashdisk kita. Lalu tentukan ukurannya dengan tidak menyertakan lokasi Bad sector.


To note that PartitionMagic able to check for bad sectors via the menu Operations -> Check for Errors as a feature in Windows. ScanDisk
This utility needs to be done before running Partition Magic to ascertain the location of bad sectors.

Well hopefully this way you can flash back to normal.

Read More..

Friday, March 7, 2014

How to fix MSVCR100 DLL is Missing


This msvcr100.dll is the Microsoft Visual C++ Redistributable dll that is needed for projects built with Visual Studio 2010. The dll letters spell this out. 

MS = Microsoft
V = Visual
C = C++
R = Redistributable


When starting some applications or games like angry birds and fruit ninja for PC this error may occur. But don’t worry. Here is an easy solution to fix MSVCR100.dll missing error. Download and Install the files below depending on your operating system version and you can start your application or games.


Microsoft Visual C++ 2010 Redistributable Package (x86)
Read More..

Thursday, March 6, 2014

How to get AVAST INTERNET SECURITY 8 for FREE upto 2050!!!


In this post, we are going to learn How to get AVAST INTERNET SECURITY 8 for FREE upto 2050!!!
It is not a crack/patch work completely. Instead it follows a clean method by patching some portion of the original AVAST INTERNET SECURITY 8.

Why AVAST INTERNET SECURITY 8 ?
According to cnet downloads, AVAST INTERNET SECURITY 8 is currently ranked #1 in Internet Security Software Suites. It makes it one of the most formidable and powerful antivirus software. Plus it runs both on the basis of virus-definition & online user statistics i.e Once a new virus is found somewhere in the world by an AVAST ANTIVIRUS, it sends it to the command center HQ and the information about that virus is immediately assimilated to all AVASTs all over the world. So it has a virtual immunity system of sorts!

Overall Protection: Avast Internet Security 8 is a complete antivirus solution
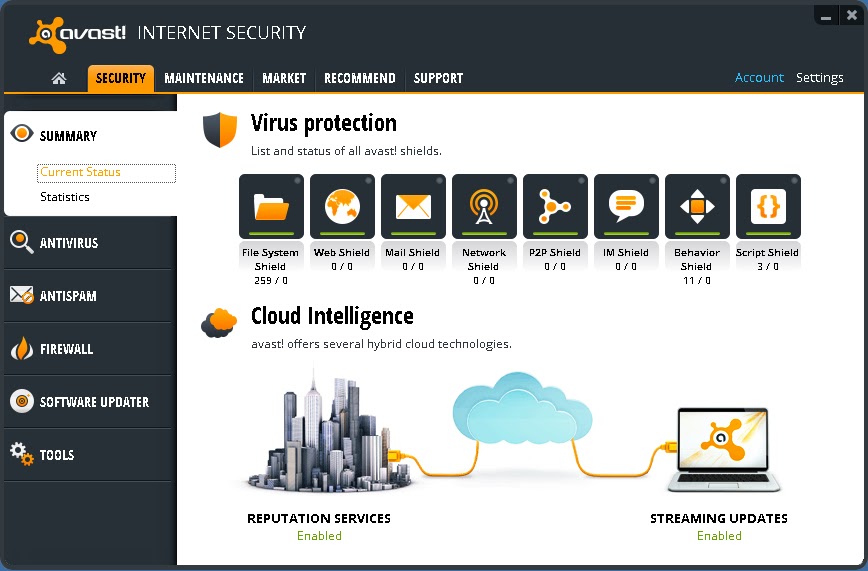


User-Friendly : AVAST has a smartphone like interface as its console.
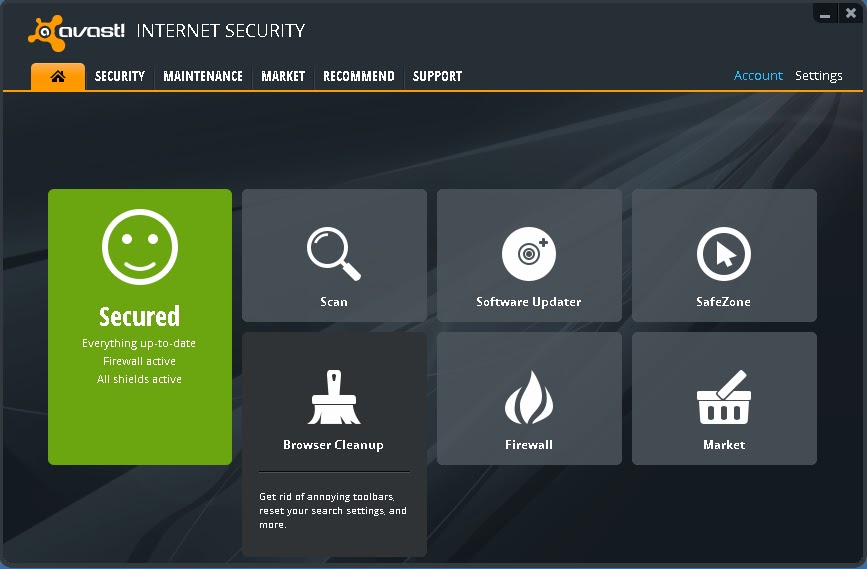


More than just an antivirus: It has many facilities like Software Updater, Browser Cleanup & Add-on management, Browser restore ; So that you dont have to rely on insecure 3rd party applications!


Okay! This is the part you have been waiting for......

HOW TO GET AVAST INTERNET SECURITY 8 FOR FREE!!

I will skip the explaining on how it works and basically tell you the process step by step.
[If you want details comment below] . Okay Here Goes,....
.
Step 1. First Download all the files that will be listed below and we can start off.
.
Download List:
>>Download Setup<< (Secure: Google Drive Internal Link)
>>Download original License file until 26/09/2013<< (Secure: Google Drive Internal Link)
>>Download License Faker until 2050<< (Secure: Google Drive Internal Link)
[A Secure high speed Dropbox link is being Uploaded or these files.  Links will be here soon]

If the above download Links dont work for you. Please try these alternatives:
>>Download Setup<< (External Link)
>>Download license file until 26/09/2013<< (Mediafire Internal Link)
>>Download license faker until 2050<< (Mediafire Internal Link)
.
Step 2. Unplug the Internet Cable or Disconnect from the Internet. You should stay offline for this. Remove your previous copy of AVAST if you have any!
.
Step 3. Install the given setup of AVAST INTERNET SECURITY 8 in "Trial Mode" (DO NOT USE LICENSE YET!! otherwise avast! will detect two licenses and your IP will be closely monitored.) Now "Restart" the computer.
.
Step 4. After restarting, open the Avast Console by double clicking the Avast icon on your desktop. On the top right option click on "Settings". Go to "Troubleshooting" on the left pane displayed in a new dialog box.
.
Step 5. Deselect or Unmark "Enable avast! self-defense  module". Click on "OK". Then open the Avast folder at C:Program FilesAVAST SoftwareAvast (your root drive may be different) and paste the file "ZeNiX.dll" after you rename it into "Version.dll". Keep "Version.dll" inside C:Program FilesAVAST SoftwareAvastSetup . Delete any "Userenv.dll" if you find any on those two folders.

Step 6.  Now run the registry file named "AVAST XP ZeNiX.reg". After the registry has been successfully added, run the program "Avast License ZeNiX 2012-06-29.exe". It is password protected. Password is "ZeNiX".
.
Step 6. Now open Avast Console again by double clicking icon at desktop. From the options given in the tab at the top, select "Maintenance". Then click on "Subscription" on the left pane selection. You will see a "10day" trial subscription. Now below that click "Insert Licence file". Now insert licence file "License.avastlic" and apply. Then you will get 13437days of amazing subscription!!
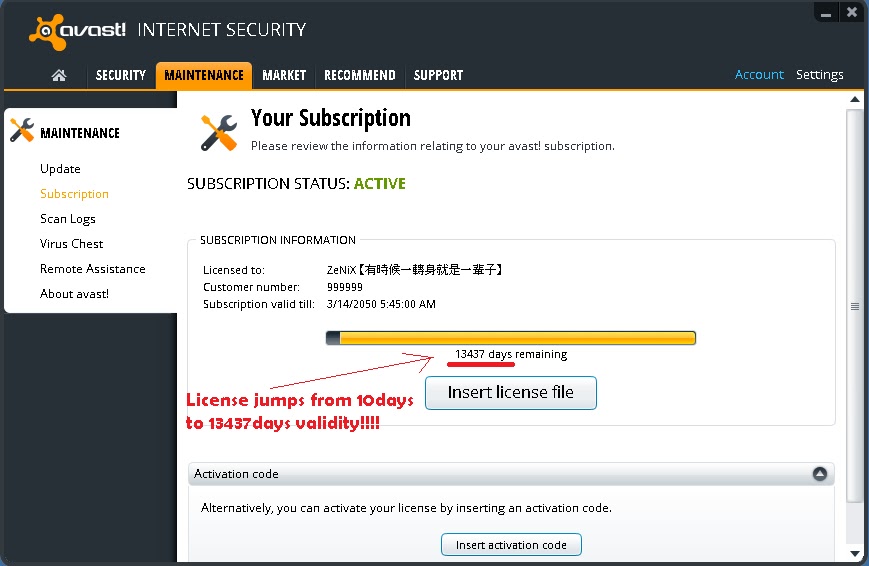


Step 7. Enable "avast! Self-Protection Module" and then restart. Now reconnect the internet connection. Be protected by software worth $49.5 for absolutely FREE!!
.
**Note : AVAST cost $49.5 (or nearly as much) for a SINGLE computer. This method can be used for multiple computers also which could cost hundreds of dollars!
.
Enjoy! and comment for review and feedback!


COMMENTS:

Read More..

Monday, March 3, 2014

How to use Asus USB MIR adaptor to other motherboard


One of my client recently try to use the ASUS USB/MIR REV. 1.11 (the 2 usb port type) adaptor which he got from his old ASUS motherboard to his new computer. His problem is any USB storage device he try to insert in ASUS USB/MIR port a "USB Device Not Recognized" pop-up appear.
The problem is, Asus have fitted filtering on the two data lines to each USB port in the form of a series resistor (10 ohms on one line and 4.7 ohms on the other) and a shunt capacitor to ground at the USB socket end which cause the problem.

The only solution is to remove this filtering by removing the four SMD capacitor (C2, C3, C4, C5). Do not remove C1, C6 and the electrolytics CE1 and CE2. I use hot air rework station to remove those SMD capacitors. After the removal the Asus USB/MIR device recognized any USB flash drive that I inserted.
Read More..

Saturday, March 1, 2014

How to Cleaning Clogged Canon Print Heads

undefinedCanon Printer CartridgeCanon printers have a removable printer head that holds the ink cartridges. It is important to print a few pages in both black and color at least once per week in order to keep the ink flowing and prevent clogging.

If the printer head nozzles are blocked or dried out you will need to dissolve the dried ink. An inkjet nozzle has a diameter of about 45 microns which is about 1/2 the width of a human hair. Normally you can clear up minor clogs and streaking by running the cleaning cycle found in your printers software utility.

However if the cleaning cycle doesnt do the trick in clearing up poor and incomplete output, dont give up and assume youll need to buy a new printer head (which can cost more than a new printer). Canon owners have reported multiple ways to resolve this problem at little or not cost - some of the most popular methods are described below.

Below Steps for Manually Cleaning the Printer Head

Step 1

  • Remove the ink tanks and printer head. Remove the ink tanks from the printer head tank holder) and seal them in a zip lock or other sealable plastic bag. Set them aside, preferably propped upright.
  • Next remove the printer head (it snaps out). NOTE : You may want to wear latex gloves to help keep ink off your hands.

Step 2
Soak the printer head. There are multiple suggestions on ways to clean the printer head and all have some variation on the following :
  • Get a small, shallow pan and lay down a layer or two of paper towels in the bottom of the container to protect the printer head circuitry from contact damage.
  • Heat up (via microwave) enough purified/bottled water to cover the paper towels. You can also use a 50/50 mixture of ammonia and distilled water (about a pint will do). Heat the mixture in the microwave for about a minute or so - it should NOT be boiling.
  • Slowly pour the water or mixture over the paper towels so that you have approximately 1/2 inch of liquid in the bottom of the pan.
  • Set the printer head into the container on top of the towels. You should see ink bleeding out. Move the print head to several different spots (about a minute each spot) and shake gently. This will dissolve the ink clogs.
  • If the printer head is badly clogged let it soak for 3 to 4 hours or overnight. You can move it slightly to a different spot every hour or so.

Alternative Soak Method :
Mix a 50/50 solution of warm water and Windex and place in a shallow container, enough to cover the base of the printer head and ink ports. Leave for 2 hours while agitating the unit occasionally. Remove from the mix and lightly scrub the base and internal ink ports with an old soft toothbrush. Do not scrub the gold contacts but dont be concerned if they get wet. Return the unit to the mix for another 2 hours and agitate occasionally. Remove and scrub again as before.

Step 3
Flush the printer head with water.
  • Hold the unit under a softly running warm water tap. Place your finger over the tap to create back pressure to allow you to squirt the water into all crevices of the printer head. You should see the gunk build up flow out. Do this until the water runs clear.

Step 4
Dry the printer head and replace.
  • Remove the printer head and rinse it thoroughly with distilled water. Shake it dry and set it on folded paper towels to air dry. (Some folks use a hair dryer on a low setting to dry the printer head.)
  • Reinsert the printer head and ink tanks. The printer should automatically do a "Printer Head Alignment." If it doesnt, manually perform "Printer Head Alignment" through the printers utility. Next run a printer head cleaning cycle or two followed by printing a nozzle check pattern to check your progress.
  • Repeat as necessary.

Variations on the Above Steps
  • Soak the printer head in one of the proprietary solutions (Cartridge Flush, Magic Inkjet Flush) specifically designed to clear print heads. Soak the print head for about 10 minutes to overnight depending on the degree of blockage. It has also been reported that you can clean the print head with an electronic toothbrush and cleaning solution for about 20 seconds with excellent results.
  • Use a full eye dropper to flush alcohol through the appropriate ink hole(s) that show inside the printer head unit. Dont rush this: do a drop at a time or you might flood the inside of the unit.
  • Purchase an ultrasonic cleaner. Wash the printer head under the water tap to remove excess ink. Load the cleaner with the printer head and water so that the printer head rests lengthways in the cleaner with the electrical contact surface visible. Repeat the cleaning program a few times, using clean water in each program.

Preventive Maintenance
  • Its a good idea to regularly conduct preventive maintenance on your inkjet printer to prevent it from developing clogged printer heads. Printer heads become blocked for a number of reasons, but the most common is simply that the ink cartridge and the printer head have dried out.
  • Never let the printer stand with an empty cartridge. Either fit a fresh one, or seal the print head unit in a plastic bag with a few drops of water for humidity. Since print heads become clogged when not used for long periods of time, regularly print a page or two to keep the print heads clear. Some experts say that it is better to print one colorful page a week than to run a printer cleaning cycle, because doing so uses a lot less ink. Ideally, printer cleaning cycles should be started once a week to prevent the printer head from getting clogged.

There are other more ink efficient ways to be able to clean printer heads that will prevent their clogging just as effectively as running the printers cleaning cycle :
  • Brush the printer heads with Q-tips soaked in water. Sources vary on whether alcohol would be more effective than water, but in the opinion of some printer experts alcohol can be harmful to printer heads and should thus be avoided.
  • Buy a cleaning kit and use it regularly on your printer. A typical cleaning kit usually has a tube of ammonia that you can spray on the printer head to remove dried ink.
  • Covering the printer when not in use to keep it free from dirt and debris also helps prevent the printer heads from getting clogged.
Read More..

Friday, February 28, 2014

How to Reset the Ink Level for Canon MX300

Canon MX300Solution to reset the ink level for Canon MX300. The methode get from printer forum
  1. Disconnect the power cable
  2. Connect it while holding down the power button
  3. With the power button still down, press twice the "Cancel/Stop" red button
  4. Release the power button
  5. The printes turns into a kind of factory mode...(wait for about 10 seconds, utils it says "Idle")
  6. Press the ">" (next to the "OK" button) once."Shipping Mode 3"
  7. Press the "OK" button.
  8. Press "OK" again for "Without cleaning"
  9. A test page will print..
  10. Open the cover, like you are about to change the cartridges.
  11. Disconnect the power cable again.
  12. Take out both cartridges.
  13. Close the cover.
  14. Connect the power cable once again.
  15. Turn the printer on.
  16. Now just put the cartridges back
Read More..

Thursday, February 27, 2014

How to Run SWF Files on Android Device

Adobe has ceased allowing Flash to be downloaded and installed to Android devices. You can’t run flash SWF files on Android device directly, but you can convert SWF to MP4, then play the converted SWF files on your Android device anytime and anywhere.

Jihosoft SWF to Android Converter for Mac is the best file conversion tool that allows you to convert flash videos, games and animations to MP4 and then make your favorite SWF videos playable on Android portable devices such as Samsung, HTC, LG, Huawei, ZTE, and more.


Guide on how to convert SWF to Android MP4 and run SWF files on Android device:

Step 1: Free download, install and launch the latest version of Jihosoft Mac SWF to Android Converter software on your computer.

Step 2: Click the “Source” button to add SWF file that you want to convert to Android MP4 video format. You can click “Play” to preview the import SWF Video.

Step 3: Select MP4 as the output format from the drop-down list of “Codec”. Then specify the output folder for the converted MP4 video.

Step 4: Click “Capture” then “Start” to start converting SWF to Android supported MP4 video format.

Video Tutorial

Device Support 
Jihosoft SWF to Android Converter supports run SWF files on most popular Android devices, including Samsung Galaxy S3, Galaxy Note 2, Galaxy Ace, Galaxy Appollo, Galaxy Beam, Galaxy Fit, Galaxy Music, Galaxy Nexus, Galaxy Pocket, Galaxy Y, HTC Desire, HTC EVO 4G, HTC One, HTC Sensation, HTC Wildfire, HTC Butterfly, HTC Explorer, HTC Inspire, Sony Xperia, Motorola Droid, etc.

More Topics
How to Converter SWF to MP4 on Mac 
How to Play Flash SWF on iPhone 4/4S/5 
Read More..

Wednesday, February 26, 2014

How to Double Side Printing on Printer Canon MX300

The Canon Pixma MX300 office all-in-one printer features the ability to print in black and white or color. It can make copies of documents, scan and connect to a computer through a USB cord. The printer also has the option to create a double-sided print job, which allow users to save paper by printing a large document onto the front and back of the paper. When performing a two-sided print job, the printer will print every front side page in a stack and then the user must manually flip the stack of paper for the backside to be printed on.

follow the step bellow :

  1. Open the Canon MX300 dialog box when youre ready to print. This dialog box should appear after you select the "Print" option from the application from which you are printing.
  2. Click the "Properties" option from the print dialog box, and then click the "Page Setup" tab. Select the printing type the meets your preferences from the "Printing Type" section.
  3. Click the box next to the "Duplex Printing" field so that its selected. Click on the drop-down menu next to the "Staple Side" field to determine the side of the page youd want a staple to be placed.
  4. Click "OK" when youre ready to print. The first side of the paper will be printed, and then a prompt will appear on your computer screen telling you to remove the paper.
  5. Turn the paper around as instruction from the dialog box, and then click "OK." The print job will then finish printing on the opposite side.
Read More..

Sunday, February 23, 2014

How to Play SWF Files on Amazon Kindle Fire

“Hey, I have an SWF File that I would like to load into my Kindle Fire. How would I go about loading this file into Amazon Kindle Fire? Any ideas would be greatly appreciated.”   - By Amanda from Yahoo! Answers

Well, it is a compatibility problem. Amazon Kindle Fire comes without flash support. That means, you can’t import SWF into Kindle Fire for playback directly. Luckily, there is still a feasible way to solve the problem, that is, convert SWF to Kindle Fire compatible video format like MP4 etc. Then, how to convert SWF to Kindle Fire MP4 video?

Jihosoft SWF Converter for Mac is recommended to make the conversion. This Mac SWF to Kindle Fire Converter offers you the ability to convert SWF files to most popular video formats, including MP4, MOV, AVI, FLV, WMV, MPEG, 3GP, and more with perfection.


Key Features of SWF to Kindle Fire Converter Mac 

  • Convert SWF to Kindle Fire supported video format on Mac with fast speed and high quality 
  • Support converting SWF files to almost all popular video formats, both SD and HD video formats 
  • The converted SWF videos will be compatible with most popular applications and portable devices 
  • Advanced video editing features are provided by this software, such as, trimming, cropping, watermark, etc. 


Step by Step Guide to Convert SWF to Kindle Fire on Mac OS 

Step 1: Import SWF File to this Mac SWF Converter 
Download and install SWF to Kindle Fire Converter for Mac into your computer. Run it, click the “Source” button to import the target flash .swf file into the program.

Step 2: Choose MP4 as the Output Video Format 
In the drop down list of “Codec”, you will see lots of output video formats supported by this software. Choose MP4 as the output format for playback SWF on Kindle Fire.

Step 3: Start to Convert SWF to Kindle Fire on Mac OS 
Click “Capture” and then “Start” to begin the conversion of SWF to Kindle Fire compatible MP4 video on Mac OS. The problem will show you the destination folder of converted video when the conversion completes.

Step 4: Transfer and Play SWF File on Kindle Fire 
Connect your Kindle Fire to computer via USB cable. Transfer the converted SWF file to it, and now you are able to play your favorite SWF video on Kindle Fire freely.

Video Tutorial

Related Articles 
How to Play Flash SWF on iPhone 4/4S/5 
How to Play Flash SWF on Samsung Galaxy S3 

Read More..